


特性模块
特性模块
特性模块是用来对代码进行组织的模块。
前提条件
对下列知识有基本的了解:
- 引导启动。
要想查看本页提到的这个带有特性模块的范例应用,参见 在线例子 / 下载范例。
随着应用的增长,你可能需要组织与特定应用有关的代码。 这将帮你把特性划出清晰的边界。使用特性模块,你可以把与特定的功能或特性有关的代码从其它代码中分离出来。 为应用勾勒出清晰的边界,有助于开发人员之间、小组之间的协作,有助于分离各个指令,并帮助管理根模块的大小。
特性模块 vs. 根模块
与核心的 Angular API 的概念相反,特性模块是最佳的组织方式。特性模块提供了聚焦于特定应用需求的一组功能,比如用户工作流、路由或表单。 虽然你也可以用根模块做完所有事情,不过特性模块可以帮助你把应用划分成一些聚焦的功能区。特性模块通过它提供的服务以及共享出的组件、指令和管道来与根模块和其它模块合作。
如何制作特性模块
如果你已经有了 CLI 生成的应用,可以在项目的根目录下输入下面的命令来创建特性模块。把这里的 CustomerDashboard 替换成你的模块名。你可以从名字中省略掉“Module”后缀,因为 CLI 会自动追加上它:
content_copyng generate module CustomerDashboard
这会让 CLI 创建一个名叫 customer-dashboard 的文件夹,其中有一个名叫 customer-dashboard.module.ts,内容如下:
content_copyimport { NgModule } from '@angular/core';
import { CommonModule } from '@angular/common';

@NgModule{
  imports: [
    CommonModule
  ],
  declarations: []
})
export class CustomerDashboardModule { }
无论根模块还是特性模块,其 NgModule 结构都是一样的。在 CLI 生成的特性模块中,在文件顶部有两个 JavaScript 的导入语句:第一个导入了 NgModule,它像根模块中一样让你能使用 @NgModule 装饰器;第二个导入了 CommonModule,它提供了很多像 ngIf 和 ngFor 这样的常用指令。 特性模块导入 CommonModule,而不是 BrowserModule,后者只应该在根模块中导入一次。 CommonModule 只包含常用指令的信息,比如 ngIf和 ngFor,它们在大多数模板中都要用到,而 BrowserModule 为浏览器所做的应用配置只会使用一次。
declarations 数组让你能添加专属于这个模块的可声明对象(组件、指令和管道)。 要添加组件,就在命令行中输入如下命令,这里的 customer-dashboard 是一个目录,CLI 会把特性模块生成在这里,而 CustomerDashboard 就是该组件的名字:
content_copyng generate component customer-dashboard/CustomerDashboard
这会在 customer-dashboard 中为新组件生成一个目录,并使用 CustomerDashboardComponent 的信息修改这个特性模块:
src/app/customer-dashboard/customer-dashboard.module.ts
content_copy// import the new component
import { CustomerDashboardComponent } from './customer-dashboard/customer-dashboard.component';
@NgModule{
  imports: [
    CommonModule
  ],
  declarations: [
    CustomerDashboardComponent
  ],
})
CustomerDashboardComponent 出现在了顶部的 JavaScript 导入列表里,并且被添加到了 declarations 数组中,它会让 Angular 把新组件和这个特性模块联系起来。
导入特性模块
要想把这个特性模块包含进应用中,你还得让根模块 app.module.ts 知道它。注意,在 customer-dashboard.module.ts 的底部导出了 CustomerDashboardModule。这样就把它暴露出来,以便其它模块可以拿到它。要想把它导入到 AppModule 中,就把它加入 app.module.ts 的导入表中,并将其加入 imports 数组:
src/app/app.module.ts
content_copyimport { BrowserModule } from '@angular/platform-browser';
import { NgModule } from '@angular/core';
import { FormsModule } from '@angular/forms';
import { HttpModule } from '@angular/http';

import { AppComponent } from './app.component';
// import the feature module here so you can add it to the imports array below
import { CustomerDashboardModule } from './customer-dashboard/customer-dashboard.module';


@NgModule{
  declarations: [
    AppComponent
  ],
  imports: [
    BrowserModule,
    FormsModule,
    HttpModule,
    CustomerDashboardModule // add the feature module here
  ],
  providers: [],
  bootstrap: [AppComponent]
})
export class AppModule { }
现在 AppModule 知道这个特性模块了。如果你往该特性模块中加入过任何服务提供商,AppModule 也同样会知道它,其它模块中也一样。不过,NgModule 并不会暴露出它们的组件。
渲染特性模块的组件模板
当 CLI 为这个特性模块生成 CustomerDashboardComponent 时,还包含一个模板 customer-dashboard.component.html,它带有如下页面脚本:
src/app/customer-dashboard/customer-dashboard/customer-dashboard.component.html
content_copy<p>
  customer-dashboard works!
</p>
要想在 AppComponent 中查看这些 HTML,你首先要在 CustomerDashboardModule 中导出 CustomerDashboardComponent。 在 customer-dashboard.module.ts 中,declarations 数组的紧下方,加入一个包含 CustomerDashboardModule 的 exports 数组:
src/app/customer-dashboard/customer-dashboard.module.ts
content_copyexports: [
  CustomerDashboardComponent
]
然后,在 AppComponent 的 app.component.html 中,加入标签 <app-customer-dashboard>:
src/app/app.component.html
content_copy<h1>
  {{title}}
</h1>

<!-- add the selector from the CustomerDashboardComponent -->
<app-customer-dashboard></app-customer-dashboard>
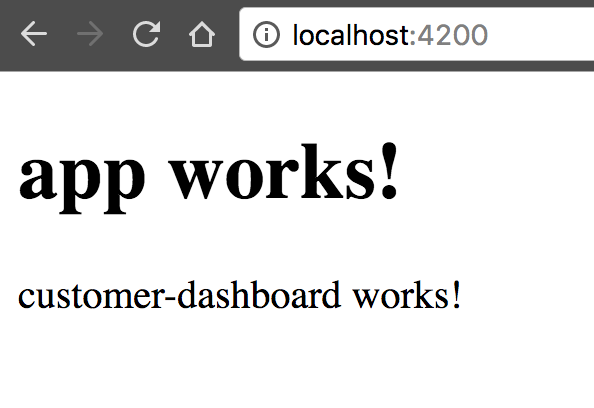
现在,除了默认渲染出的标题外,还渲染出了 CustomerDashboardComponent 的模板:
关于 NgModule 的更多知识link
你可能还对下列内容感兴趣:

